Create a plugin project (Mac)
Overview
Like for Windows, Loupedeck offers a .NET-based command line tool that generates the needed project and solution files for macOS. Mono is used to run the portable .NET executable on macOS, so Mono needs to be installed on your Mac to run the Loupedeck Plugin Tool.
Instead of generating the plugin project, you can also download the demo plugin skeleton project from DemoPlugin/Step01.
In the instruction below the symbol '~' denotes the file path to the user's home directory. It can be used interchangeably with /Users/USERNAME where USERNAME is the login name of the currently logged-on user.
Steps
-
Make sure that the Loupedeck software is installed.
-
Stop the Loupedeck service from the menu bar.
-
Download and unpack the Loupedeck Plugin Tool for Mac from Loupedeck Developer Page. In this instruction, we assume that you unpacked the tool to ~/Downloads directory.
-
Open the Terminal.
-
Make sure that the Loupedeck software is installed in the default folder:
-
Set the current directory to the place where you want to create the plugin project. A root directory for a project will be created with the project file structure underneath. In this instruction, we will create a ~/sources directory for all your projects.
mkdir ~/sources
   cd ~/sources
1. Assuming you have unpacked the LoupedeckPluginTool to ~/Downloads folder~/Downloads/LoupedeckPluginTool generate -name=DemoThis should create the project files in ~/sources/DemoPlugin directory -
Open Visual Studio and open a DemoPlugin.sln navigate to ~/sources/DemoPlugin
-
Build the solution to verify that it compiles without errors.
-
Note that Debug build binaries go right to the folder from where Loupedeck loads the 3rd party plugins (~/.local/share/Loupedeck/Plugins)
-
Start the Loupedeck software. Wait until the Loupedeck configuration UI opens.
-
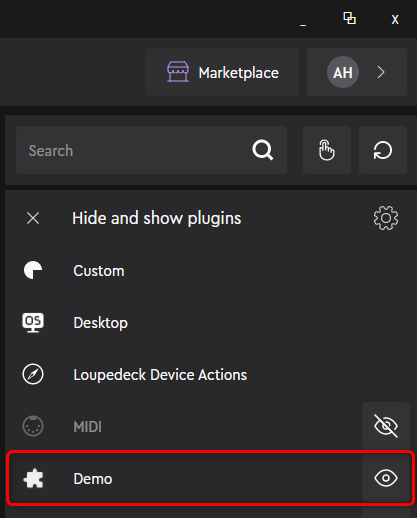
Unhide the "Demo" plugin on the "Hide and show plugins" tab of the Action panel. The plugin should be now shown in the UI.